Class 2: Soldering Basics
Soldering is the act of using a hot soldering iron to melt solder, which quickly becomes solid again to form electrical connections.
Safety
The soldering iron is HOT. DO NOT under any circumstance do any of the following:
-
DO NOT touch any metal part of the iron, including the tip, unless the iron is turned off AND you know that it has been off for at least 10 minutes.
-
DO NOT place the soldering iron anywhere besides its holder when you are not using it.
-
DO NOT try to multitask while holding the iron. If you need to do something with the hand that’s holding the iron, place the iron back in the holder, do what you need to do, then pick it up again.
-
DO NOT hold the metal part of a component that you are soldering to. It will heat up as you solder to it.
How to Solder
Before you start, make sure your sponge is damp (not soaking wet), and set your iron to ~315 C (600 F). Note that if you have a large area to solder to this may require a higher temperature. You shouldn’t ever need to use a temp higher than 400 C (750 F).
Make sure your tip is clean. If you have been using it a lot, you may need to wipe it on the sponge every once in awhile and retin your tip.
Tin your components and the tip before soldering. Tinning means to apply some solder to the components you are working with so that the solder will flow and connect better. It’s a good idea to tin things such as wire, pads (for surface mount), legs of resistors/capacitors/ect. Also tin the tip of your soldering iron by applying a bit of solder directly to the tip of the iron. If there is too much solder on the tip, you can wipe your iron quickly on the sponge. Applying flux to the component before soldering can also improve your joint.
When you are ready to solder your components, place the component in the board and solder one leg while holding the component in with your other hand. This creates an anchor so your component will be straight, flat, and will not move. Then solder in the rest of the legs. You can reflow the first leg if you didn’t get a great joint.
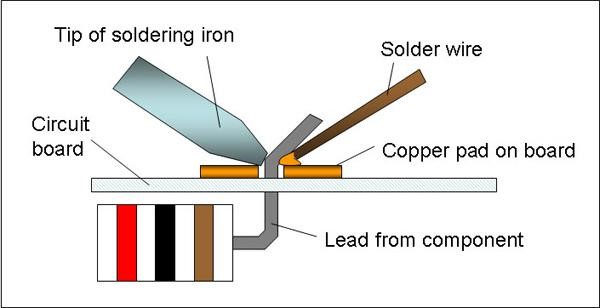
To solder a component, you need to apply heat to BOTH surfaces that are being soldered together. The iron is NOT used to heat the solder. Heat the COMPONENTS THAT ARE BEING SOLDERED, and apply the solder to the COMPONENTS, not the IRON. The solder will flow into the hot components and form a nice joint. Always remove the solder before you remove the heat, and work with a steady hand.
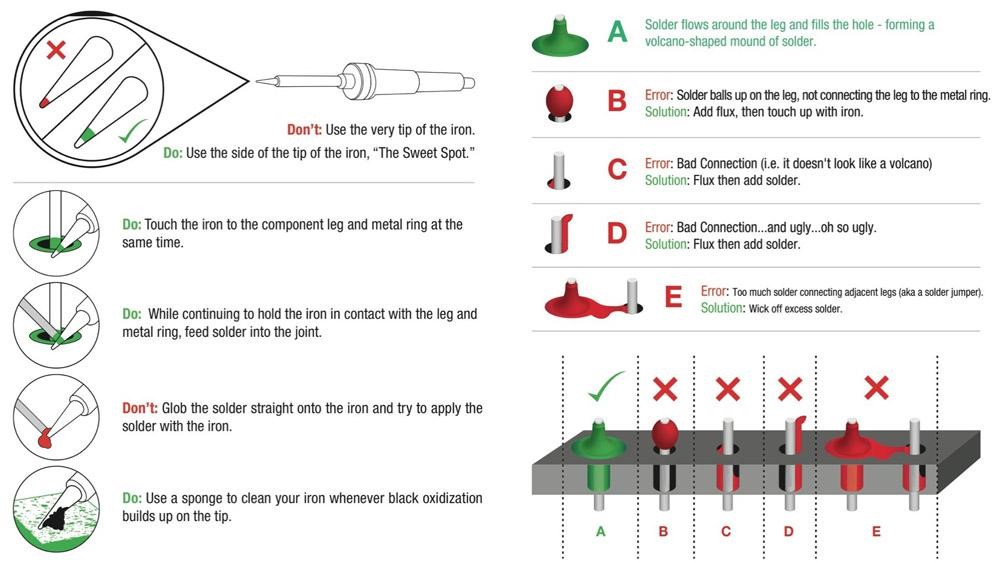
To allow the most heat flow, do not poke the components with the tip of your iron. Try to hold the iron at an angle to put as much surface area of the tip on the components as possible. Your joint should form a hershey kiss shape. If your joint refuses to look like a hershey kiss, and you are using the right technique, quickly dip the iron in flux and reflow the joint. Refer to the image below to identify a solid joint.
After your component is soldered, trim the legs if necessary. I recommend also to remove excess flux with a toothbrush wetted with 90% or higher isopropyl alcohol.
Fixing Mistakes
If two things are accidentally soldered together, first try to reflow the solder to disconnect them. Applying flux may also help. If there is too much solder to disconnect the two components (and they can’t be physically moved away from each other while the solder is hot), you will have to remove the solder. There are two ways to remove solder: desoldering wick and vacuum pump.
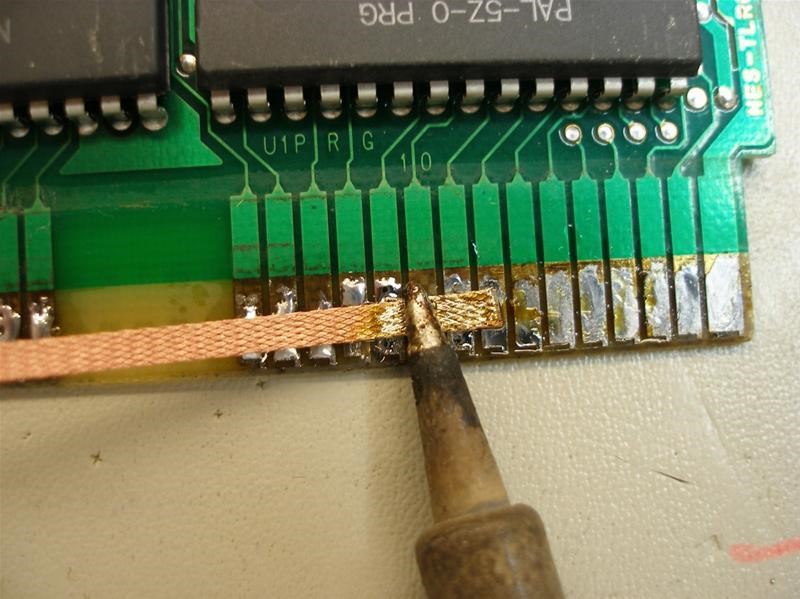
To use the desoldering wick, put some solder on the tip, place the wick on top of the solder joint, and place the iron on the wick (sandwich the wick between the iron and the joint). The solder will flow into the wick and out of the joint. Always remove the wick BEFORE you remove the iron, or the wick will be soldered to the joint.
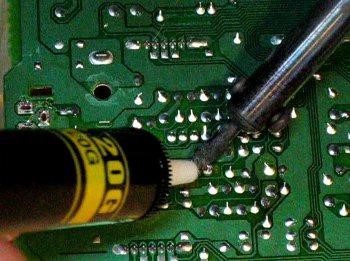
To use the desoldering pump, load the pump by pushing down the lever. Heat the solder with the iron and place the pump close to the liquid solder. Push the button on the pump to suck up the solder while it is liquid. Remove the pump, then the iron. Empty the pump by loading it again and repeat if necessary.
Recommended Supplies
You do not need to buy any of these. The lab has all of these supplies for you to use. However, if you want these supplies for home, (any EE or CE major should own these supplies at some point in life) these are what I recommend. The supplies without links you don’t need any specific model.
● PCB holder or Third hand tool
● 60/40 leaded solder
● Flux (paste or liquid)
● Desoldering braid (or pump, I prefer braid)
● Tweezers
● Flush cutters
● Wire stripper
● 90-99% isopropyl alcohol